Kimchi was one of my first cultured veggie experiments. If you're new to fermentation, fermenting vegetables is one of the easiest experiments to start with, you just need vegetables and salt, and maybe un-chlorinated water.

I love making my own kimchi. I make huge batches whenever napa cabbage is available, kimchi lasts for months in the refrigerator.
Fermentation is one of the oldest methods of food preservation, making the food more nutritious and yummy too!
This is not the traditional way of making kimchi though, I find this method simpler. I have tried soaking the cabbage in brine, but I liked this method better.
Benefits of Fermented Foods:
- Preserves food
- Enhances flavour and digestibility of food
- Increases vitamin levels and makes nutrients more bioavailable
- Source of nutrients like vitamin K2 and many B vitamins
- Contains probiotics, the beneficial bacteria
- Promotes the growth of healthy gut flora, restoring balance in your digestive tract
- Strengthens the immune system - an estimated 80 percent of our immune system is located in the gut
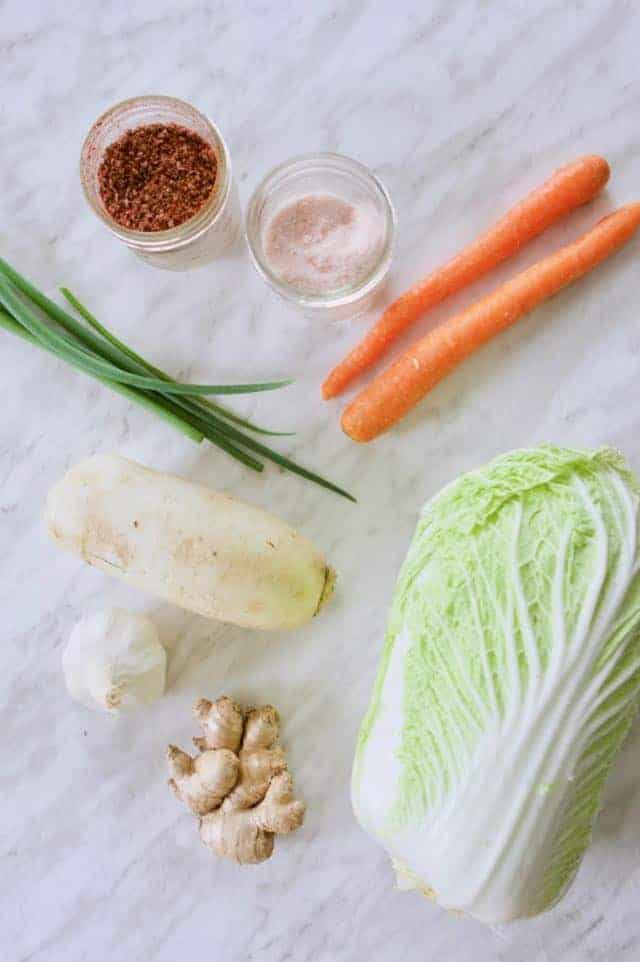
What You'll Need
Kimchi is made with napa cabbage, radish, carrots, ginger, garlic, green onion and gochugaru.
Try to get fresh and organic ingredients whenever possible. (Read more about my food philosophy here.)
Napa cabbage is usually found in Asian markets. I've been lucky that organic napa cabbage is available at our local organic market.
If you can't find napa, I would think kimchi can be made with other kinds of cabbage as well, haven't tried it yet though!
You'll also need radish, usually daikon is used for kimchi. Daikon is the long white radish also found in Asian markets.
Fermentation is also about using whatever is available, so if you can't find daikon, try any other radish. I've tried easter egg radishes (pink outside white inside), watermelon radish (white outside pink inside), and even golden beets!
Tips:
- Use the back of a spoon to peel ginger.
- Save the green onion bottoms with the roots and put them in a small jar with water - they'll grow back!
Salt is needed for fermentation, it allows the good bacteria to grow and inhibits the growth of pathogens or bad bacteria.
Gochugaru is Korean red chili pepper powder. You'll also find this is Asian markets or online. If you can't find gochugaru, try whatever red chili pepper powder you can find.
You'll also need a large mixing bowl and some glass jars. Any size will do, I usually opt to reuse my pint or 500mL mason jars to make kimchi.
How to Make Kimchi
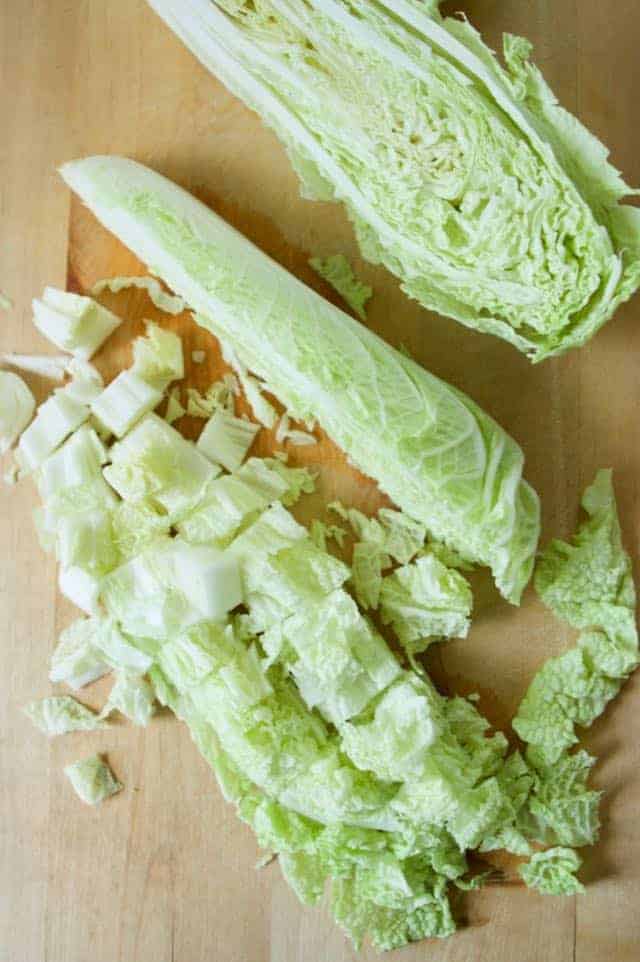
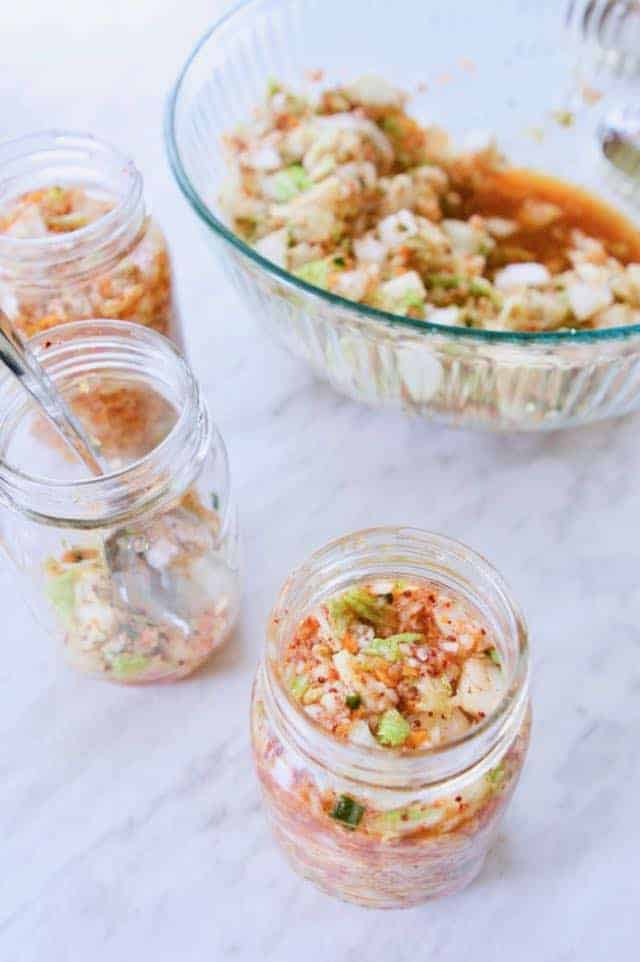
Rinse the napa cabbage well. Cut the napa cabbage in half lengthwise. I like to cut the napa cabbage into ½ inch squares, so I would cut each half into 4 pieces lengthwise and slice into ½ inch squares. Trim off the root end. You can cut into bigger pieces like traditional kimchi or even smaller pieces if you want to.
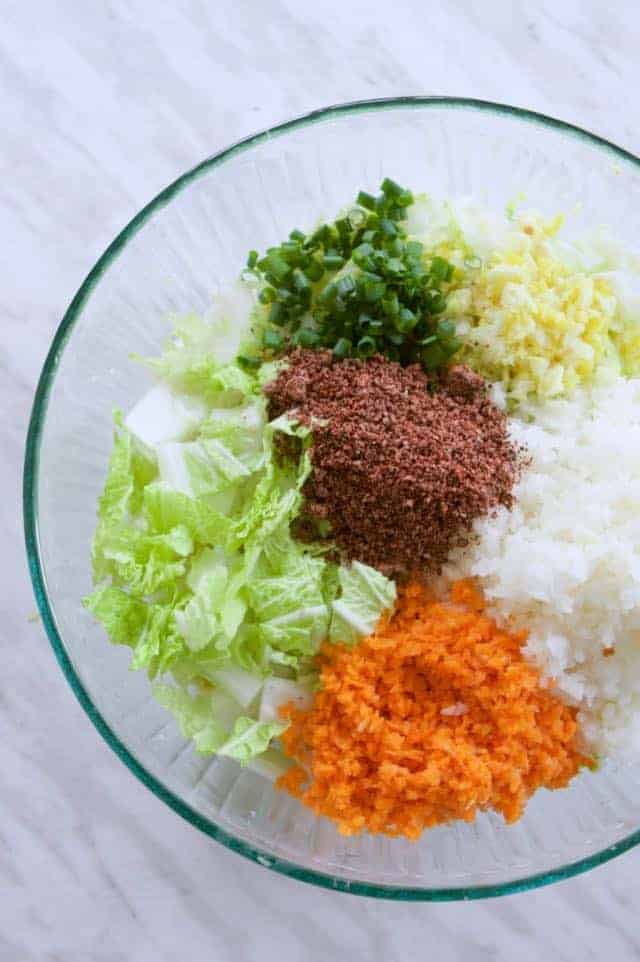
Use a food processor to cut the carrots, radish, garlic and ginger into smaller pieces. Or you can grate or mince them by hand. Cut the green onions into ¼ to ½ inch pieces.
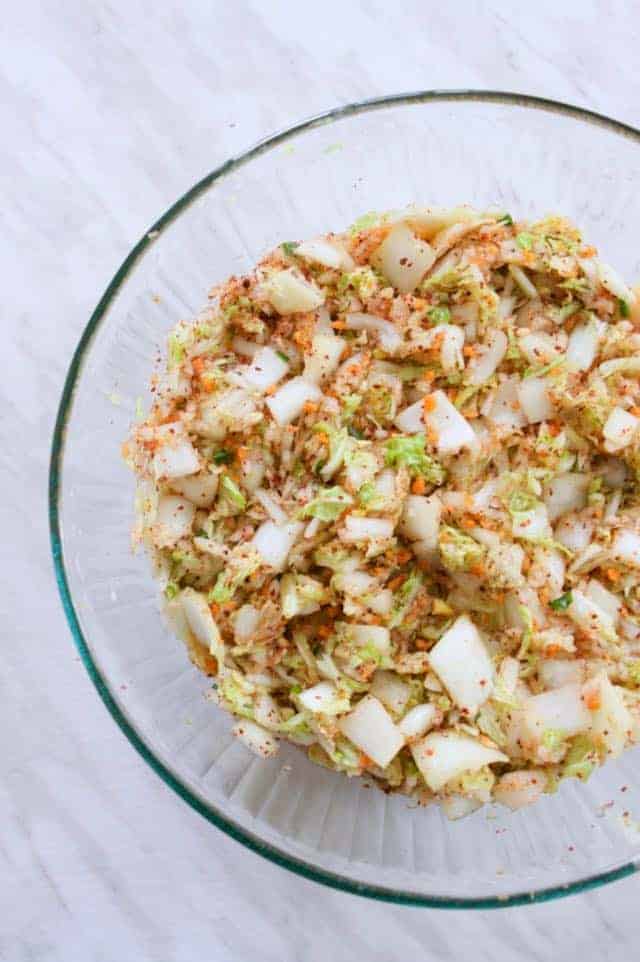
In a large bowl, add all the cut vegetables, salt and gochugaru.
Kimchi Massage
You will need to massage everything together for 5 to 10 minutes. You may opt to use gloves to do the massaging as the chili powder can sting your hands.
Let this sit for another 5 to 10 minutes, then massage again for another 5 to 10 minutes or until liquid is released.
Once it looks like there is enough liquid, put the kimchi into glass jars. There is no need to sterilize the jars, just rinse them with hot water and (non-antibacterial) soap.
Spoon the kimchi into your glass jars, pressing down and making sure everything is covered by liquid.
Fermentation Time
Now it's time to let your kimchi ferment. Place the jars on a plate or bowl and keep the lids loosely covered. You'll want to let the kimchi breathe.
As the good bacteria multiply, they release carbon dioxide and you'll start to see bubbles in your jars. This will also push up any veggies and liquid, thus the need for the plate or bowl to catch any spillovers.
Place the jars on your kitchen counter away from direct sunlight. Keep them away from any other ferments you may have to avoid cross-contamination.
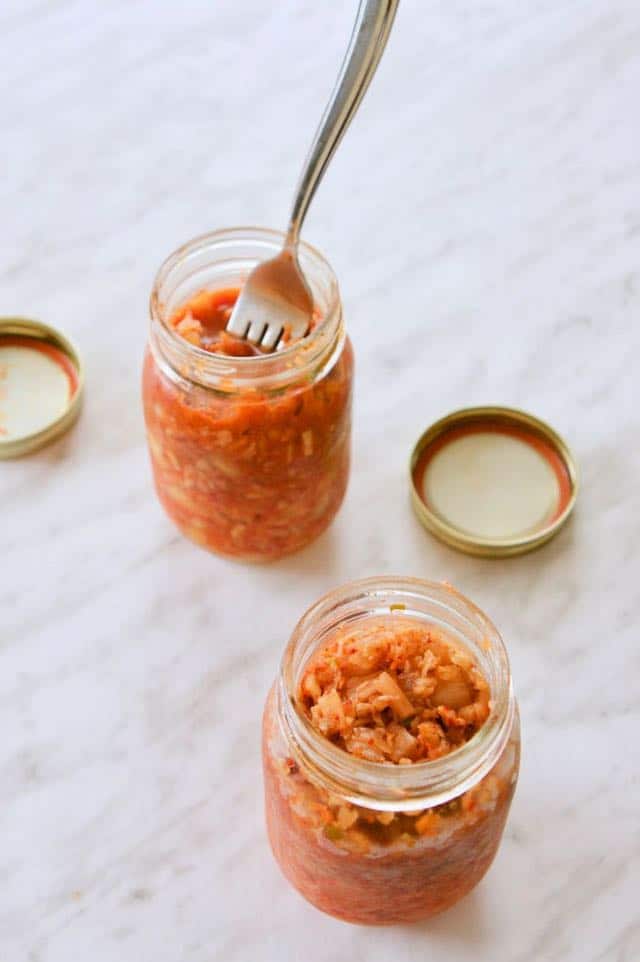
Everyday, open the jars and push down the veggies if needed. Remember that everything has to be submerged in liquid. You may taste the kimchi after a couple of days, always using a clean fork.
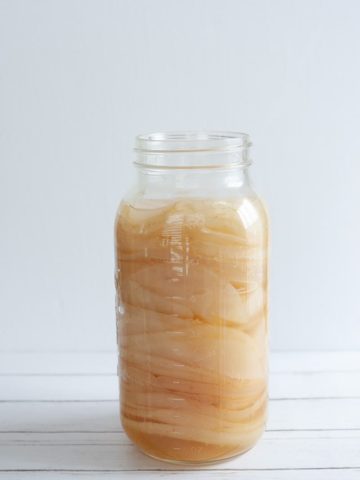
After 4-5 days out on your counter, once your kimchi has your desired taste, tighten the jar lid and place the kimchi in the refrigerator. This will last for months in the fridge.
See how the colour of the liquid and vegetables has changed in the fermented kimchi below.
Eat some kimchi every day and your gut will thank you!
Have kimchi as a condiment. Try it with my bibimbap bowl recipe, fried rice, maki rolls, or even congee.
Tried making kimchi? Please leave a comment or rating below.
Try my other fermented food recipes too:
- Fermented Salsa
- Gluten-Free Blueberry Banana Sourdough Muffins
- Make Your Own Kombucha Sourdough Starter
- Pineapple Kombucha Green Smoothie
- SCOBY Fruit Leather
- Watermelon Kombucha Shake
Want to learn to brew your own kombucha? Check out the Kombucha Brewing Guide I wrote for the Academy of Culinary Nutrition. Or book an online kombucha brewing workshop with me.

Ingredients
- 1-2 small napa cabbages
- 1 radish (daikon, watermelon or red), peeled and grated
- 1 carrot grated
- 2 cloves garlic minced
- ½ inch piece ginger peeled and grated
- 2 stalks green onions cut into ½ inch pieces
- 2 tablespoon sea salt
- 3 tablespoon gochugaru or red chili pepper powder
Supplies
- glass mason jars
- gloves (optional)
Instructions
- Rinse napa cabbage well. Slice cabbage in half lengthwise. Trim off the root end. Slice halves into eighths lengthwise, then slice into ½ inch square pieces.
- In a large mixing bowl, add cabbage, radish, carrot, garlic, ginger, green onion, sea salt, and gochugaru.
- Massage everything together (gloves optional) for 5-10 minutes. Rest and let it sit for another 5-10 minutes. Massage again until liquid is released.
- Spoon kimchi into glass jars, pressing down firmly and making sure everything is submerged in liquid.
- Place jars on a plate and keep lids loosely covered. Keep jars on the kitchen counter away from direct sunlight.
- Every day, open jar, press down with a clean fork.
- After 4-5 days, once kimchi has your desired taste, cover jar tightly. Place in the refrigerator.
References:
- Katz, Sandor Ellix, and Michael Pollan. The Art of Fermentation an In-depth Exploration of Essential Concepts and Processes from around the World. White River Junction, Vt: Chelsea Green, 2012. Print.
- Schwenk, Donna. Cultured Food for Health: A Guide to Healing Yourself with Probiotic Foods. Carlsbad, CA: Hay House, 2015. Print.

Janet
Will your kitchen recipe ferment without using chili powder, or by using far less chili powder?
Melissa Torio
Yes, this will still ferment without or with less chili powder. Without the chili powder, it may turn out more like sauerkraut.
Reem
Thank you thank you for those soo easy recipe, I have a question though can I do it with less liquid like some of my fried had kimchi sauce instead of kimchi water, I don’t know if you know what I mean.
Melissa Torio
Less liquid may work. As long as all the vegetables are submerged in liquid, it should be OK. I hope this answered your question.
Carmen
This looks like spicy coleslaw.
Melissa
More like spicy sauerkraut.
Amelita
Hello! I plan to try fermenting vegetables adopting your recipe. However I noticed that you didn’t use a fermenting agent such as yeast as other recipes I’ve read mentioned its use. What do you think is the difference? Thanks.
Melissa
This is fermented by the "wild" yeast on the vegetables and in your home/kitchen. Use of a starter may speed up the fermentation process but is not necessary to get fermented kimchi. Let me know how it turns out!